Custom Search
Showing posts with label lens. Show all posts

Saturday, January 30, 2016

Helios -44-2 58mm f2 Lens

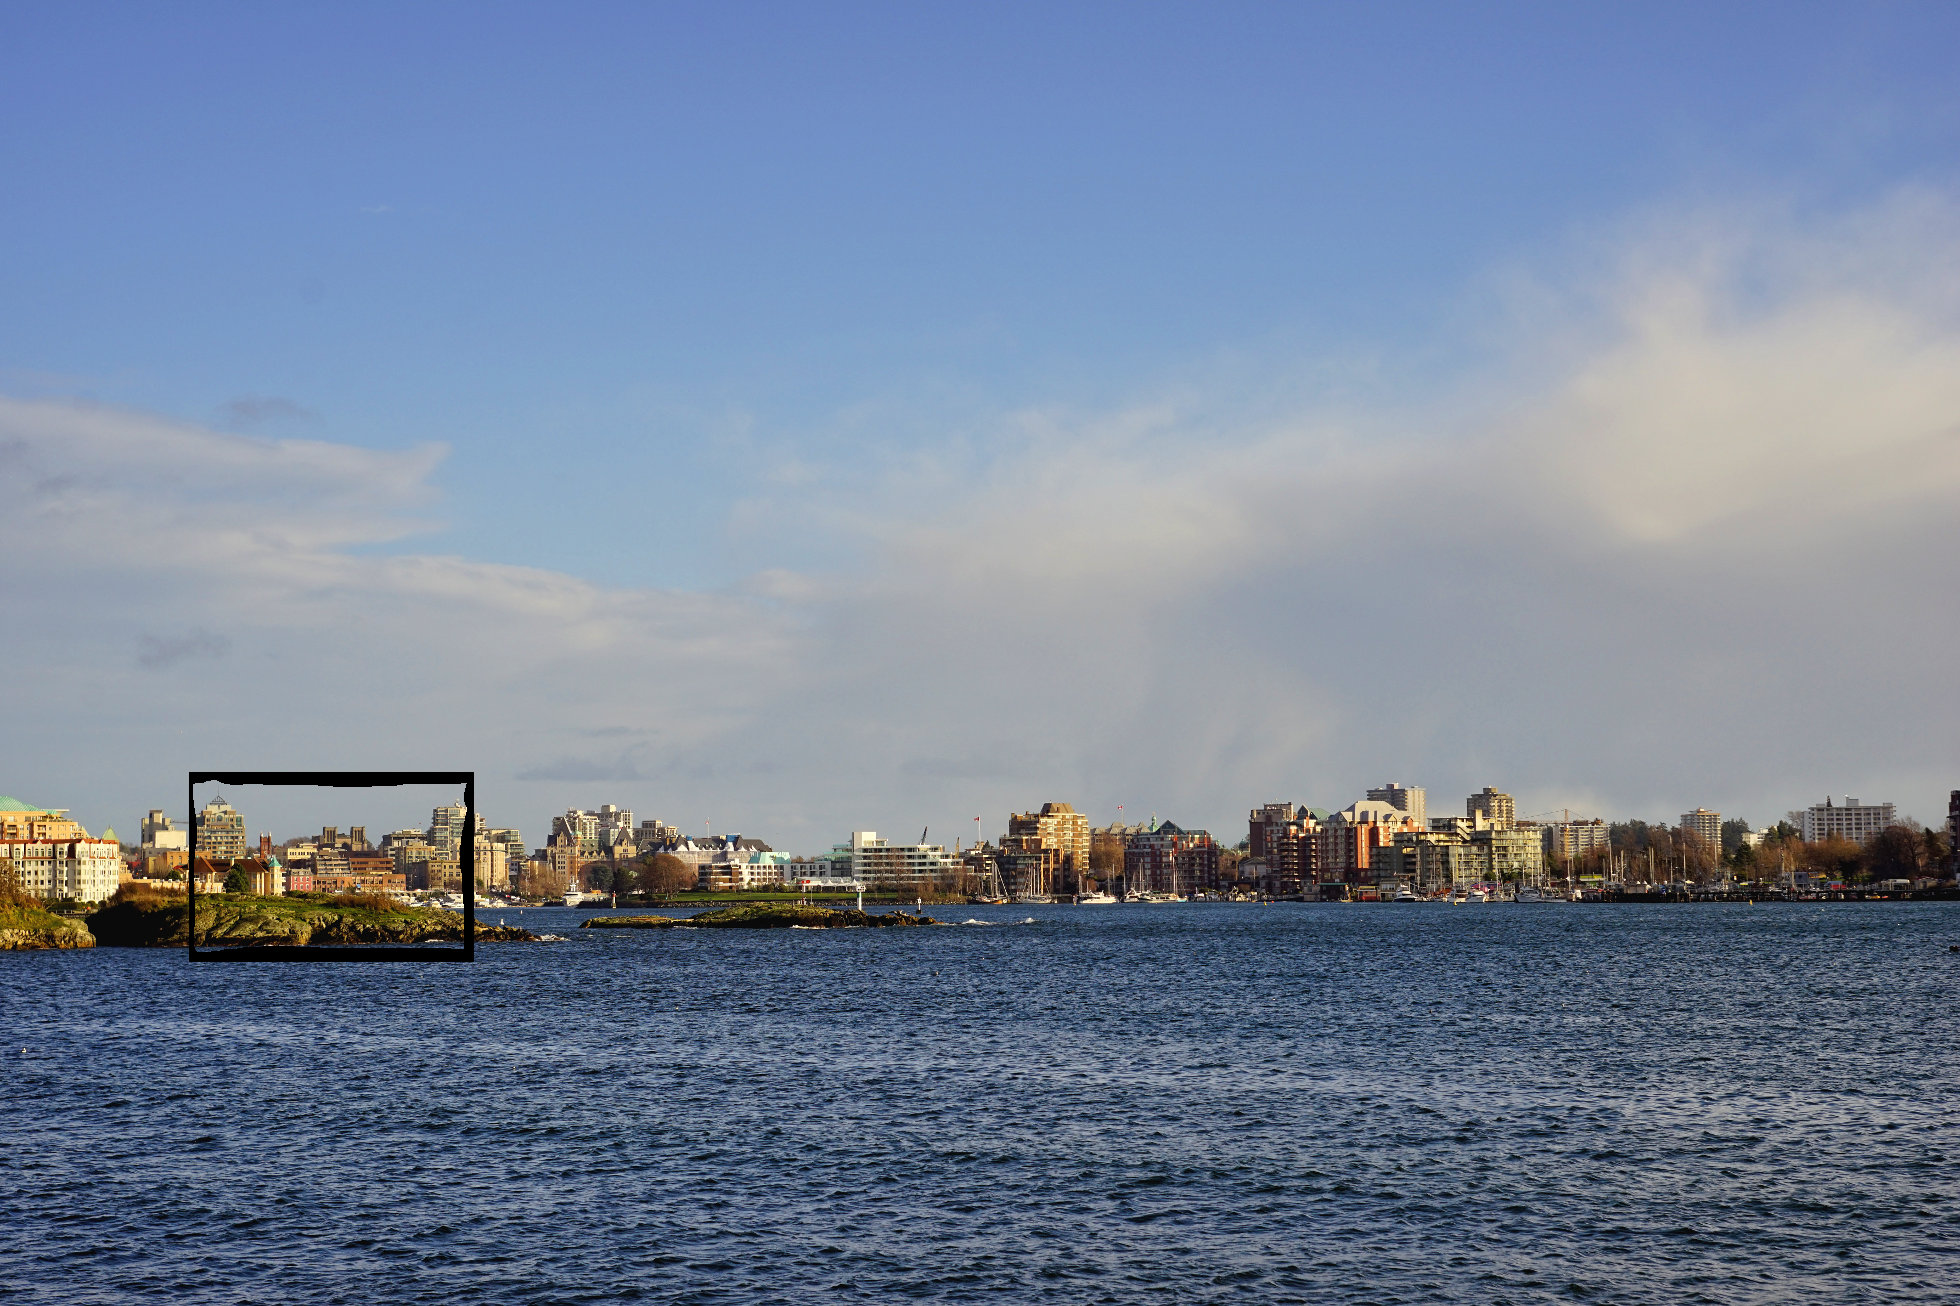
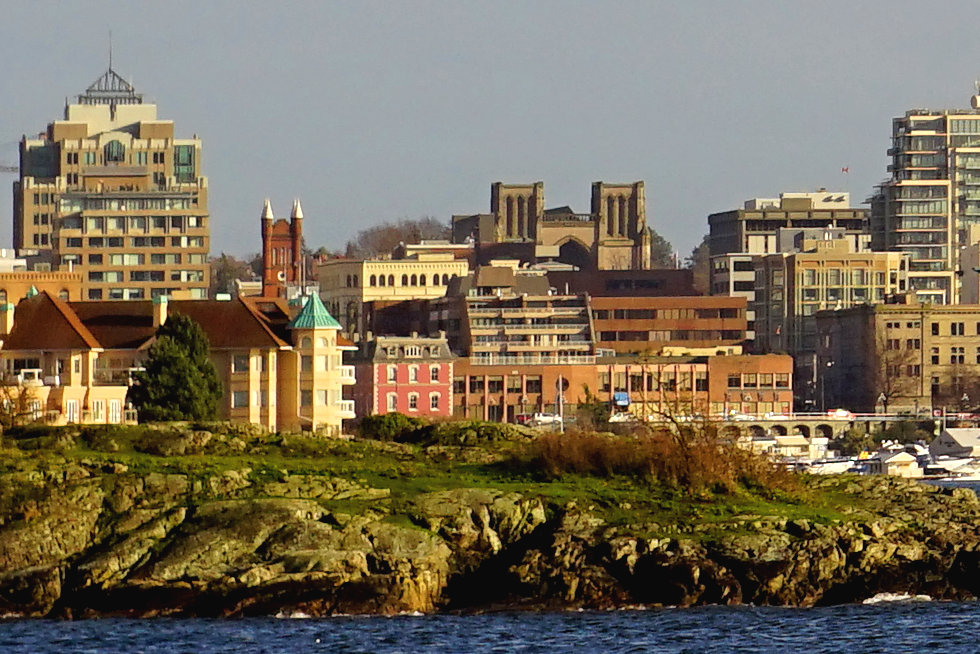
We're having very blustery, changeable weather lately. Victoria has a weather pattern of cloudy/rainy mornings followed by clear, sunny afternoons and lately we've seen some ramped up versions of this with very cloudy stormy mornings followed by brilliantly clear windy afternoons. I took advantage of this weather yesterday afternoon to try out a little lens I got some time ago, a Helios 58mm f2 screw mount lens about 50 years old. This is a Russian made lens, all manual. I am impressed at this $10 item. The photo above has got lovely color a is very sharp - the 100% crop below will give you some idea of how sharp this lens is. It also has a beautiful and unusual bokeh I'll show you next week.

Friday, August 29, 2014

Lens Distortion 3

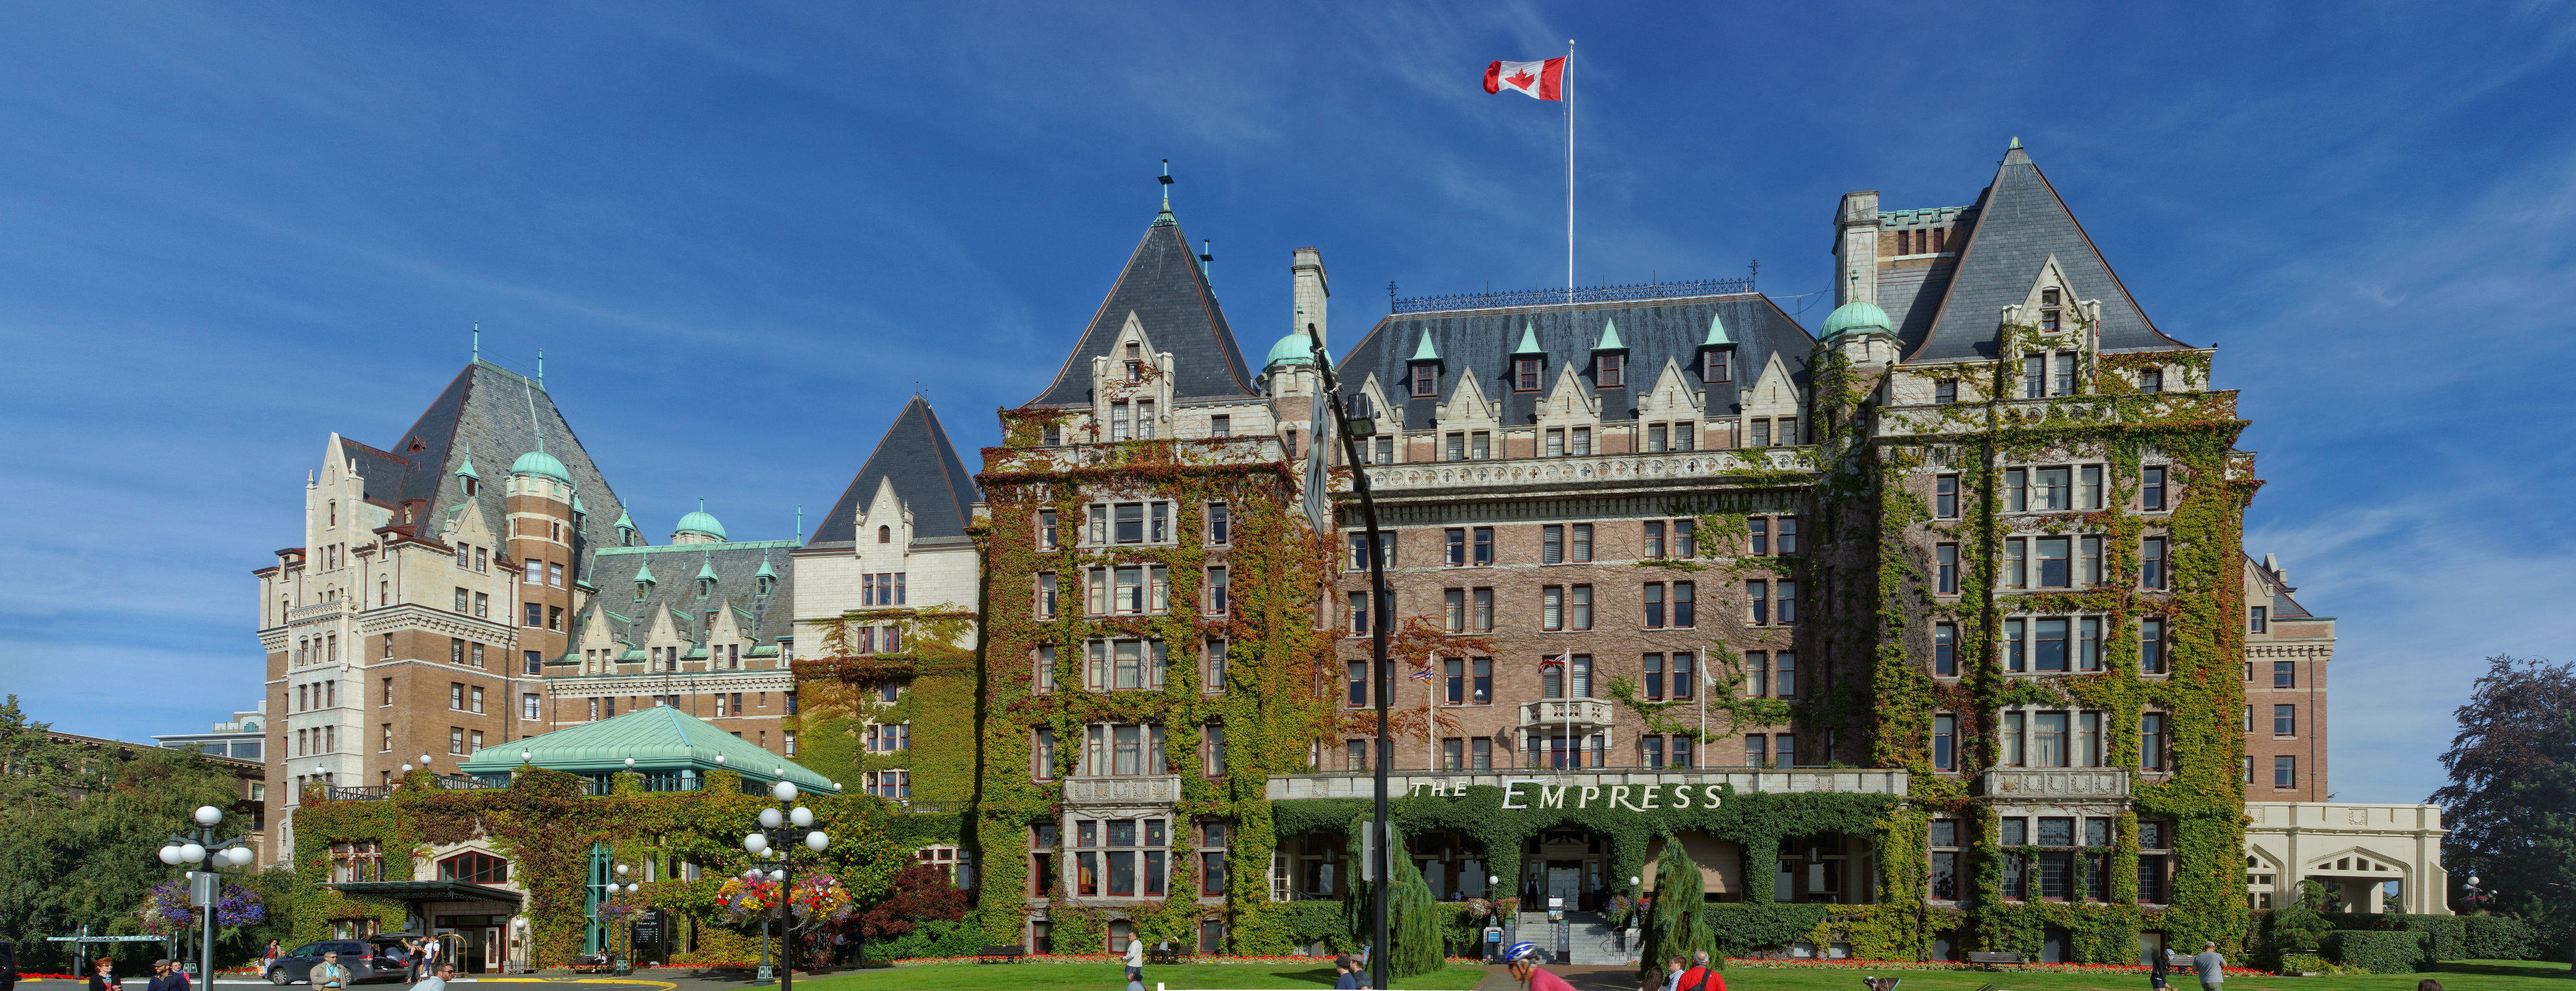
Stefan Jansson suggested in a comment on yesterday's post that a good experiment would be to shoot a panorama using a standard lens and that was precisely the thought that occurred to me as the next step. The photo above of the Empress Hotel was shot using a 35-70mm zoom at 35mm. The panorama consists of 9 shots altogether - 5 across the bottom and four on top. I wish I had included a bit more foreground but most of the foreground was Government Street with busy traffic and wouldn't have improved the photo. Also I would probably have needed a third strip of photos across the top if I had aimed lower for the bottom strip of photos. Aside from that, the distortion in the above photo certainly is less than in the single 10mm wide shot below, although the latter (shot several years ago) is much more dramatic. However, when all is said and done, it seems to me that some level of distortion is inevitable because of the nature of lenses. Even our eyes distort reality. In fact, we probably never know what anything really looks like. However, it behooves a photographer to at least have some awareness of how his or her equipment is affecting the image being created. This series has helped me to understand a bit of what happens when you point a lens at something.

Thursday, August 28, 2014

Lens Distortion 2

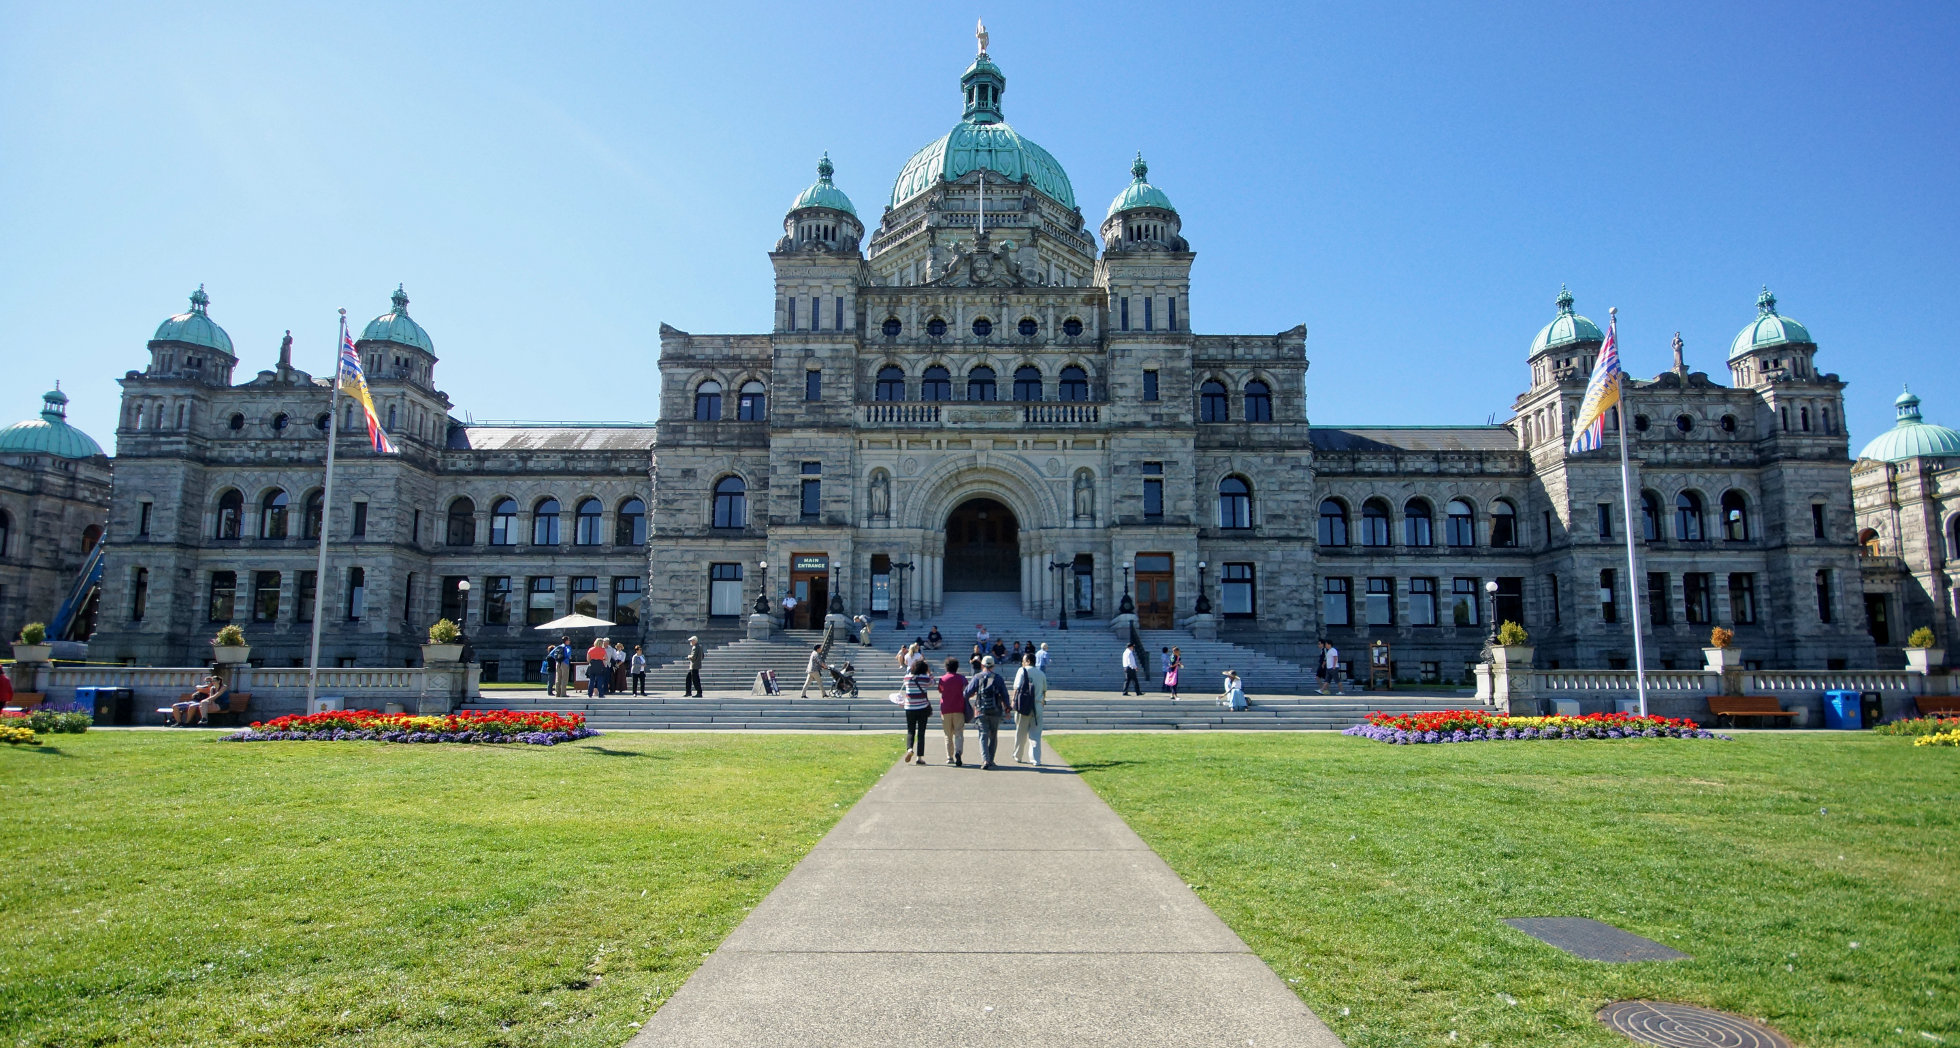
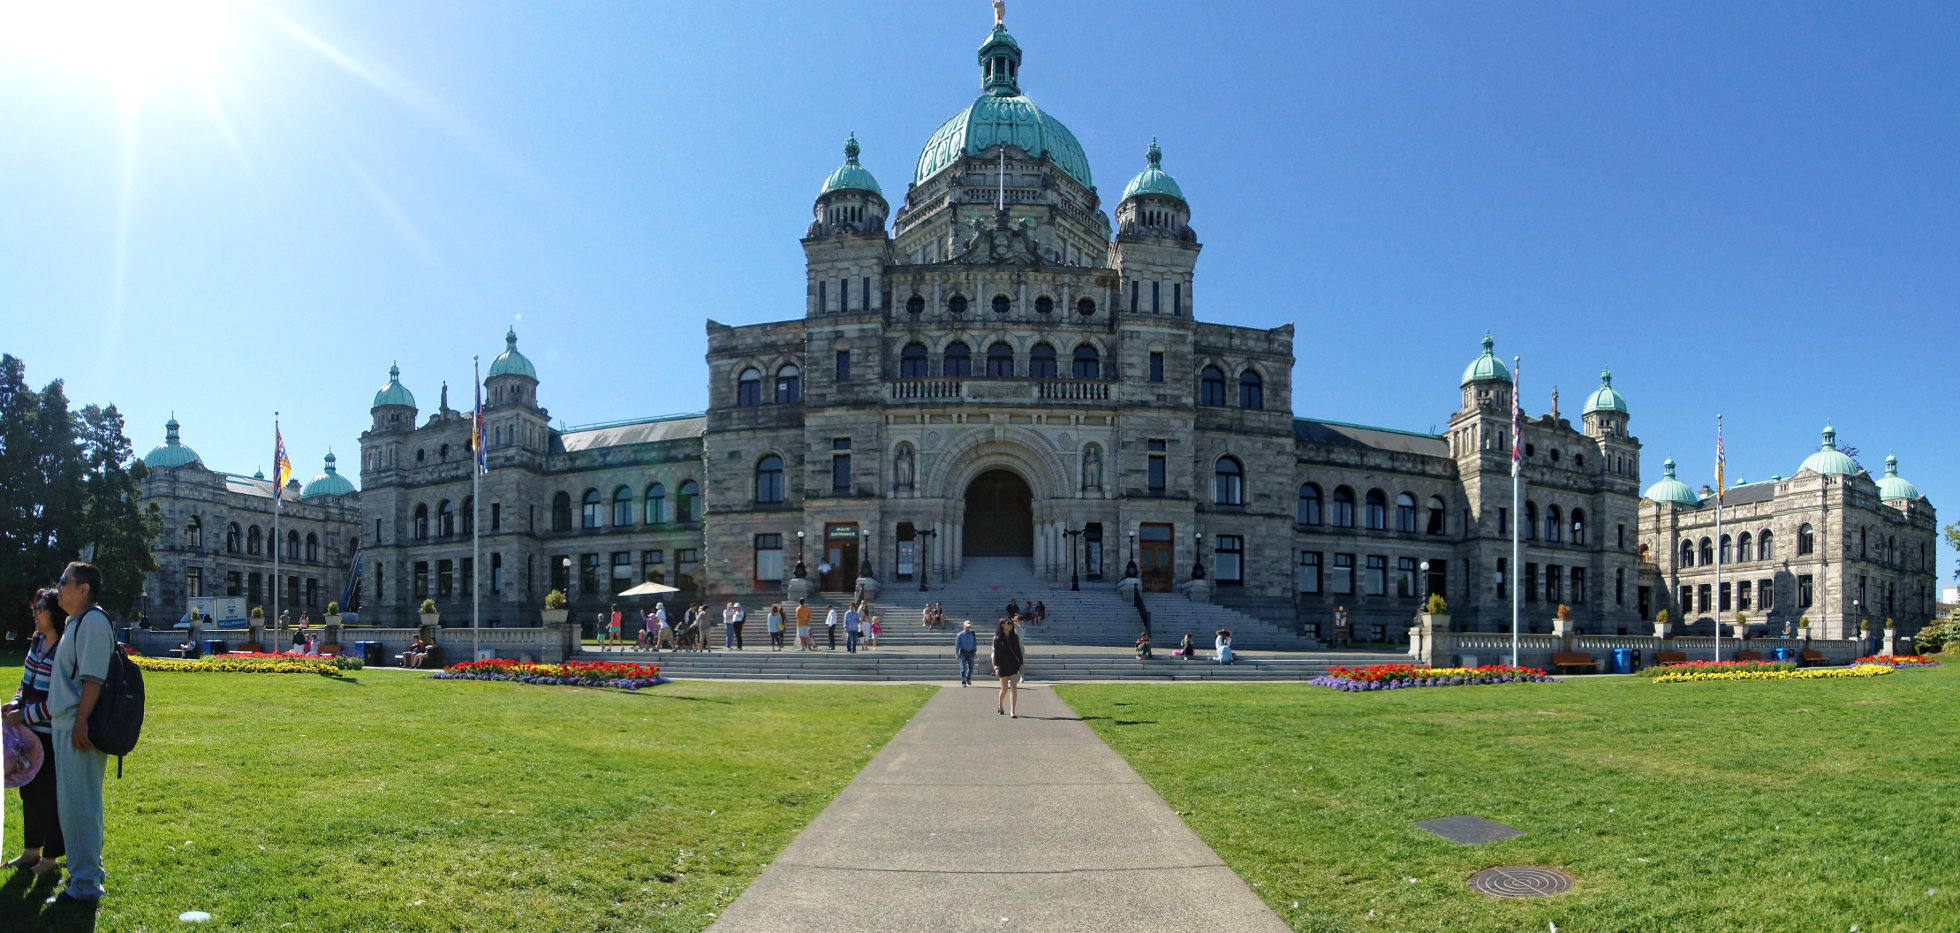
Yesterday I said I would try an experiment to reduce lens distortion on wide angle photos. Above is the BC Legislature through a 10mm wide angle lens. Note the way the walls seem to slant towards the center on the edges of the photo. Below is a stitched panorama of the same scene composed of two photos. Here all the walls are not sloping in but sloping out and if you compare the rooflines in the two photos you will see that in the top photo the rooflines are nice and straight but in the bottom photo they are sloping. Hmmm. Back to the drawing board I guess....

Wednesday, August 27, 2014

Lens Distortion

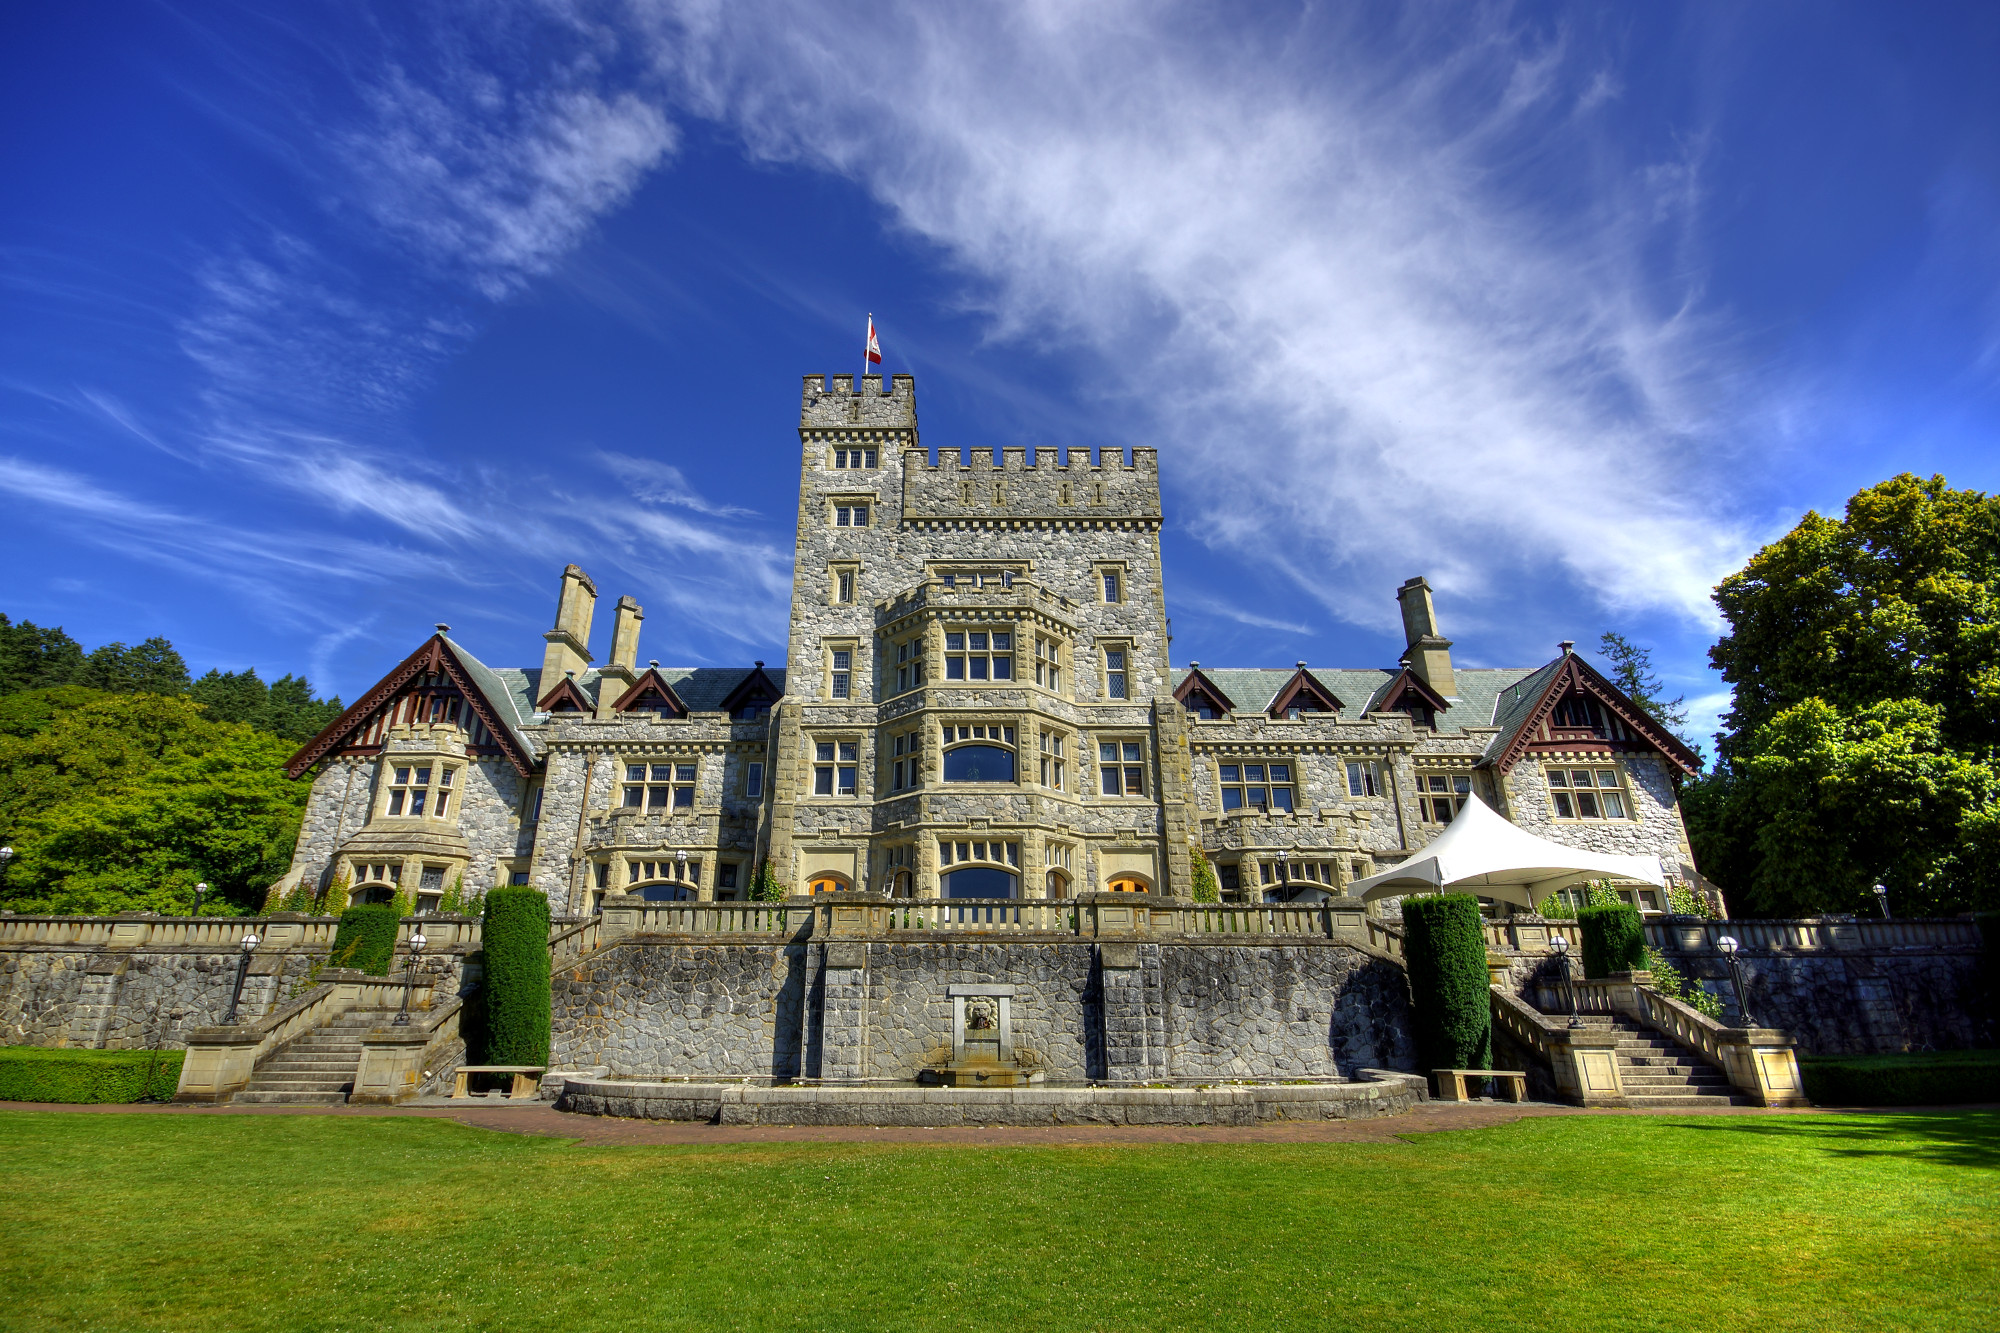
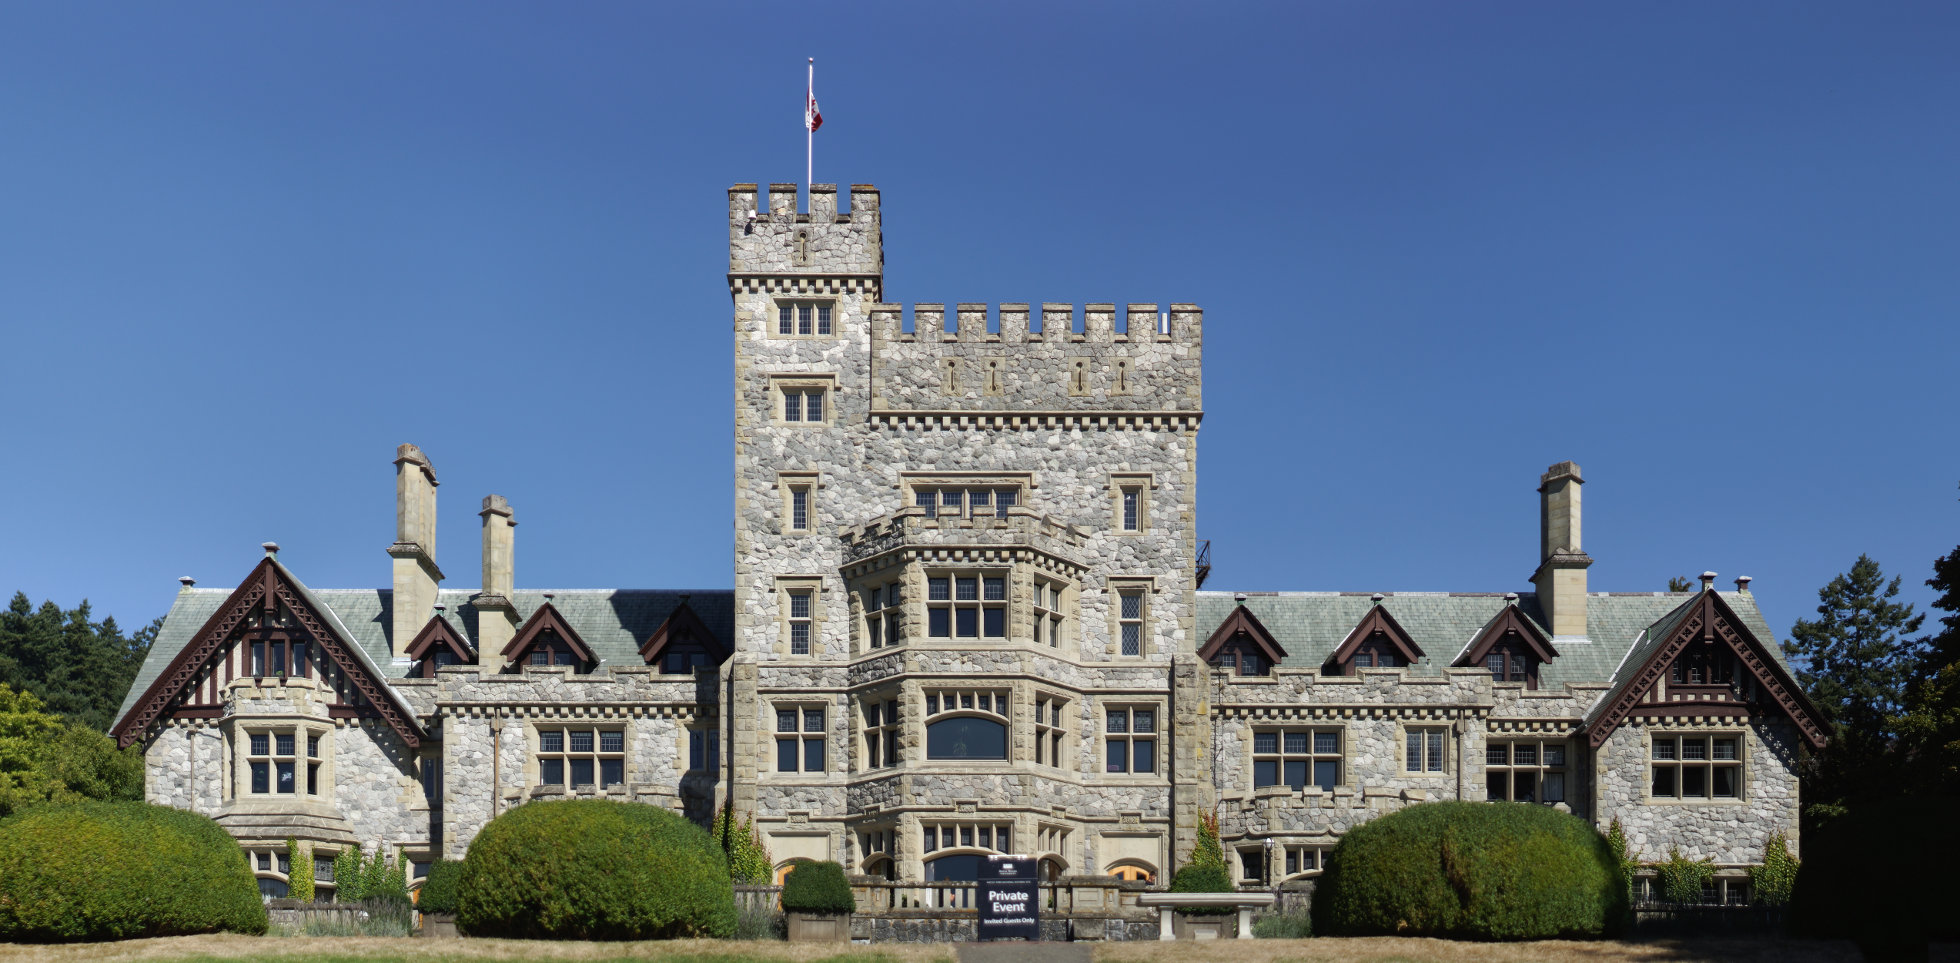
Last year around this time I was exploring the way lenses distort reality. All lenses distort reality to some extent. (This, in my opinion, puts paid to the purist argument about the truth of images taken directly from the camera without further processing as against images that have been altered or enhanced after being downloaded from the camera.) Notice in the top photo how the Hatley Castle's walls appear to slope inward. This was caused by using an ultra-wide angle lens at its widest setting (10mm) in order to get the whole building inside the frame. The problem I was trying to deal with had to do with how to correct this lens distortion. The solution I found is below. Sometime later I returned to Hatley Castle and took a whole series of shots (10) with a 50mm lens. 50mm lenses are generally agreed to produce photos that are most like what our eyes see. These were then stitched together and straightened using software called Hugin. It produces enormous panoramas (the original of the shot below is over 10,000 pixels wide). The end result (below) is certainly much closer to what we see. The next challenge is to photograph the Legislative Assembly Buildings using the same technique. Stay tuned!

Saturday, January 15, 2011

Below Beacon Hill 2

Messing around with multiple screw-on filters can cause vignetting - those black areas in the corners of the above photo. If I want to use the photo I will usually just crop it so these don't show. However, after looking at this photo a number of times I decided not to crop the vignetting because in this case I like the effect. It might just be nostalgia. When I was very young and had serious wanderlust, those far away places with the strange sounding names were always, in imagination, viewed through a ship's porthole. Imagine waking up in the morning and looking through that magic circle to see the pyramids of Giza in the hot desert sunlight or Chimborazo rising in the mist. That wonderful circular frame still seems to me like the mind's eye.

Friday, December 17, 2010

Depth of Field

We had some sun and blue skies today but I got engrossed in some experiments indoors with regard to various lenses I own and depth of field. Today's photos were shot with the 90mm macro lens. On the left, with the lens open to its maximum aperture f2.8. On the right with the lens closed down to its minimum aperture f32. Below is midway between the two - f16. These are the images I expected to result but for me it was valuable to actually see the difference aperture size makes. In all these photos, the number "9" was nearest to the lens and the number "3" was most distant.

Thursday, December 16, 2010

Blur

Ever since I started to take photos with a digital camera I have spent a lot of time and energy trying to get sharp images. It's a special challenge to do this digitally because the smallest unit of color digitally is a pixel whereas with film, the smallest unit is a molecule of whatever photosensitive chemical is used on the film. And, while a pixel is pretty small, a molecule allows for much finer detail. But along with this quest for increased sharpness I have grown aware of the beauty, variety and uses of blur and now, in addition to my ongoing search for increased sharpness, I also try to gain more control over blur. Today's photos are results of some recent attempts to produce a very shallow depth of field (lots of blur) by shooting with a wide aperture (between f1.4 and f4) and using a short extension tube. My underlying goal here was to isolate the subject of the photo by having everything else blurry. My favorite kind of blur is very smooth and creamy as in the photo above. But I also like the more patterned blur as in the photo below. Either, however, serves to isolate the subject of the photo and draw attention to it. The more proper photographic term for the out-of-focus areas of a photo is bokeh and Wikipedia has a good article on it.

Above is a species of Usnea lichen, probably Usnea filipendula. Below is the remains of a seed cluster from English Ivy (Hedera helix).

Thursday, December 10, 2009

Frost

While the rest of the country has been suffering from severe snow storms Victoria has had relatively mild weather though it has been windy and colder than usual. After I mentioned a week or so ago that we had not yet had a freeze, the temperature has dropped so it is freezing every night. I've actually been looking forward to snow since it makes the environment more picturesque but we have none yet so I decided to make do with frost. Above is what it looks like in my back yard this morning.


Lenses: For those interested in technical stuff, I also went out this morning to test some of my old legacy lenses with an extension tube I picked up last week. The above was shot using a Super Multi-coated Takumar 1:2.8/105mm lens and pair of extension tubes totaling about 2 inches (5 cm.) The tubes and the lens are M42 mounts and I use them on my Sony with an adapter.

Saturday, April 4, 2009

Another Seagull

After a gray, cold, rainy week, blue skies returned this afternoon and I went out to test the new (used) 300mm telephoto lens. It's another old prime lens and what better subject than one of Victoria's ubiquitous seagulls. This one was perched on top of a power pole about a hundred meters from where I was standing. I'm pretty pleased with the lens. And I learned that if you get ready to click the shutter and then wait, wildlife will almost certainly do something more interesting than just sit there. All you have to do is be ready.

Thursday, April 2, 2009

Of Lions and Lenses

Lately I've been collecting old lenses for my camera (mostly because I can't afford new lenses but also because I'm still very much an experimental, neophyte photographer and don't really know what different kinds of lenses do). Anyway, I recently bought a multi-coated 105 mm f2.8 Takumar lens for $10 and, with an adapter, stuck it onto the front of my Sony DSLR. This is all manual now: focus first, then set the aperture using a ring on the lens case, then set the shutter speed. It sounds a bit much compared to today's fully automatic photography but I found that with just a little practice it's quite easy. The through the lens metering system still works and indicates when the shutter speed and aperture combination will provide the correct exposure. Well, I'm very pleased with this lens. Nice color and very sharp images. The photo above is also an example of learning from another photographer. I always liked Chuck Pefley's shot of this lion from his trip to Victoria last year. This is my attempt to emulate that shot. You can see the original version on Chuck's Seattle Daily Blog by clicking here. The lions (2) stand one on each side of the Gate of Harmonious Interest on Fisgard Street in Victoria's Chinatown.


IF you're interested in lenses, read on: The lens mentioned above is a prime lens, meaning that although it is telephoto, it does not zoom in. If want something in the frame to be bigger you must physically move closer. Nor does it zoom out - if you want something to be smaller you must move back. I have a couple of other prime lenses: a 135 mm f3.5 and yesterday I bought a 300 mm f5.5. If it wasn't a miserable rainy day today I'd be out trying the latter since I am very excited by the sharpness of the test shots I took with it. It probably sounds like I have money to burn but I paid less than $50 total for all three of these lenses because they're old, manual and don't fit on modern cameras without adapters. I found them in thrift stores. You can buy adapters on E-bay. All three of the lenses above are M42 screw mounts so I only needed one adapter ($7). Yesterday's flower photos (below) were also taken with the 105 mm lens.